Welcome to The Creative Spirit

WELCOME.....to The Creative Spirit....my own little creative nook, filled with simple little projects, grand ideas, and anything suggested by my Creative Muse........

Monday, November 19, 2012

December Art Journal Cover


Here it is....the newly created cover for the Christmas Art Journal. I had so much fun with the art journal last year and I hope to this year also!  I'm not very good at all about pre-prepping pages like is always suggested. 

This cover is made from an old board book that I stripped off the original printed materials and then covered with some green card stock.  The Ho Ho Ho part is actually holiday packing tape!  The December is cut from a magazine, the 2012 are stickers, the snowmen cut from scrapbook paper, and the Santa is a recyled card front! I plan of doing the inside of the front cover next as a dedication page!  More details to follow soon.

Once again I am trying to create the art journal without buying materials. I do admit I bought some materials last year on clerance after Christmas so I will use those, combined with recycled cards and other materials to create! I am also "allowed" to use anything from my stockpile of materials. My goal is to eventually not have such a BIG stockpile!

Thursday, October 25, 2012

Day 18 Scary Movie

It's an old movie but one that had me awake for nights....I can still hear the sing song chant when I close my eyes....CREEPY!

Day 18 was to create a page featuring a scary movie!

Monday, October 15, 2012

Day 14 Pages: Bats or Owls

Day 14 is to work a bat or an owl into your page. This is a creation by Tim, one of the members of The Creative Spirit Facebook group. Isn't it neat?  The owl is created with tissue page.

Day 14 using a bat cut out.


Day 14 by Jessica a member of the Facebook Creative Spirit group...I love the title...Bats Rock!

I'm loving the Halloween journal and the facebook group has so many creative people!  If you would like to join please check it out at:

Creative Spirit at Facebook

Sunday, October 14, 2012

Art Journal: Day Three and Four


Things that Go Bump in the Night...I tried playing around with a thicker kind of white paint. I'm not sure I like it...I went back later and added some glitter purple to tame it a bit.

Creepy Crawlies....spiders (from Dollar Tree) and the white paint again with purple glitter.  Not my favorite pages but it was fun playing around!

Tuesday, October 2, 2012

Halloween Art Journal Day One and Two


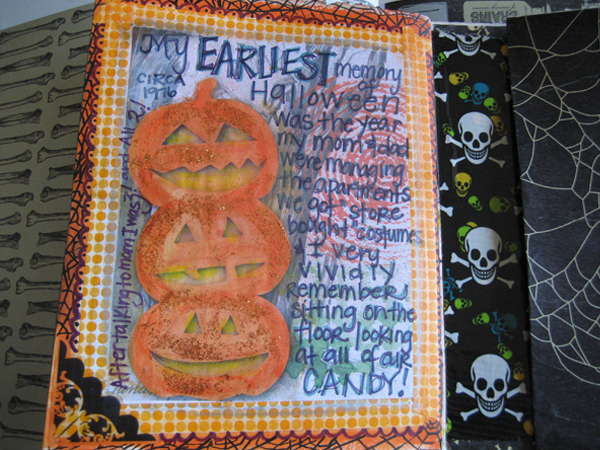
Day One Prompt: Childhood Memories. Do your page about anything that you remember from childhood. A favorite costume. A special Halloween or even parties at school.

Day Two Prompt: Halloween Bucket List...what are some things you would still like to do that involve Halloween?

October is here and the fun has begun!!

Tuesday, September 25, 2012

Faith Collage

So the homework this week at church was to create something to express our faith.  For those of you that have read some of my earlier posts and things on Facebook, you may remember that back in January of 2012 I started a little (and I do mean litte) art journal called Soul Musings that I consider my spiritual art journal...so the idea presented was not foreign to me. 

In fact, a couple weeks back when the pastor encouraged people to start small groups I thought about suggesting a faith art journal group but then I thought..."ummm no, probably people would be afraid to join such a group saying they are not great artists." Those of you that art journal know you do not need to be a great artist....that's not the purpose of an art journal. So I kept quiet and then in my inbox that same week was an email about a Journal Your Faith class...coincidence?  I'm still keeping quiet... it's an idea on the back burner. Life has been hectic of late and I'm not sure how much time I truly have to spare.

I did however create a Faith Collage to share. Yes we are suppose to bring them to church but I am out of town this coming weekend so I had a short time line to create it....I'm not sure I LOVE it...but it is, what it is...and I taped a description on the back so people could understand the images better and how I see them tied to faith. 

Monday, August 20, 2012

Art Journal Materials

Gathering materials for the Halloween art journal made me start thinking about materials in general. People often ask...what do I need to make an art journal. The truth is as little or as much in the way of materials as you want. A basic would include markers (I LOVE sharpies.) I know some of you use more professional markers but for my needs Sharpies work GREAT and now they are in lots of colors. I have other markers too but find I like the strong vibrant sharpies the best. Also basic for me is an adhesive. I do a lot of collage so this is a must. If you paint and/or draw then this may not be as important to you. Paints and sketching pencils if you like that medium. And of course a book or pages to bind into a book! That's about it!
The collage materials are the most challenging for me. I look for them every where. In magazines, ads that come in the mail, newspapers etc. I often find some GREAT FREE printables online but one must be cautious of smearing with them! I don't BUY collage materials very often because they have such a "scapbook" feel. Not that I don't like scrapbooks but it's just not what I want in my journal.
However I did buy some collage materials at the Dollar Tree recently. See. I told you I look for materials everywhere! These great silhouette shapes will be perfect for the Halloween art journal!
They had spiders, owls, rats, and bats! There are 15 in a package and some of them have different poses. At first I thought they were tissue paper but they aren't. They are a nice crisp black paper, not exactly cardstock but thicker than just a sheet of paper! I had to take a couple out to see if they would fit my pages. I'm not using them like this I just wanted to see the size!
Can't wait to play around with these. Perfect for the Creepy Crawlies prompt...or...the Are You Afraid of Your Shadow prompt...or any number of the October prompts!

Sunday, August 19, 2012

Prepping a Board Book

So after pondering and thinking and wondering about WHAT type of book I will use for the Halloween art journal, I happened upon some children's board books at the flea market. I thought hmmmm alter these? I counted the pages. Most board books would not work for the Halloween or Christmas art journals because they do not have enough pages. I counted, I counted again and again. Yep THIS one has 32 pages...I could use it by doing a final double page for Halloween.
Now how to prep the pages. Sometimes people just use the images on the pages as part of their art journal images but I knew this wouldn't work for my Halloween art journal.
I read a bit online about altering board books and discovered three methods.
1. You can use sandpaper to lightly sand the slick pages so things stick better.
2. You can use gesso and paint over the images on the pages.
3. Carefully tear off the top layer of the printed page.
I opted for method three.
If you start at a corner and work down along the edge of the page you can then pull it across the page and remove it as one large sheet. Sometimes it will tear off bits and they are a little more difficult to remove but overall it is pretty easy!
Now I have a nice blank board book for a dollar! Much cheaper than buying a board book at a craft store and again even in the store it is difficult to find one with the right number of pages!

Sunday, August 12, 2012

Halloween Art Journal

I'm still thinking Halloween. I've created a prompt list for the Halloween art journal. I've posted it on The Creative Spirit Facebook page if you would like to get a peek at it, please ask to join. We would love to have you! As October rolls around I will post longer detailed desriptions of each prompt! You might also use them as writing prompts if that fits your needs better!

Facebook Creative Spirit.

Tuesday, August 7, 2012

Halloween Art Journal Pages

I know...I know...I have LOTS of other projects before the Halloween Art Journal....but....I'm thinking Halloween this morning.....so here are some pages that caught my eye..
Bat page from Glitter and Glue. It's made from cut outs from a gift bag!
Another great one from Altered Gypsy.
Another inspiring one from Spun Monkey Designs.
A fun two page candy one from Glitter and Glue. (again!)

Saturday, July 28, 2012

Garage Sale Finds=Craft Projects

See this sort of hideous white and pink house....well it's not hideous but it's not for me! It can actually hang on the wall (shudder) and it opens up to reveal some shelves inside.
Well today was the City Wide Garage sale here in our town and so I'm always on a mission to find "junk" to turn into something cool! This house caught me eye right away but what could one do with it? My daughter (quick thinker that she is) suggested spray painting it black and turning it into a haunted house for Halloween. As soon as she said that I could envision it...so I grabbed it up and waited to see the price (because it didn't have a sticker) I mean I wanted it but it would still depend on PRICE. Guess the price...........25 cents. Yippee....it's mine and will become my September project here at The Creative Spirit. I'll share with you the photos (good or bad) of how it turns out and we will se if it is a quarter well spent!

Sunday, July 8, 2012

Banners

I've been wanting to try making some of those stylish cute banners I keep seeing everywhere. I haven't managed to do one yet but here's a round up of some super cute ones that I'd like to try. Featured above is one made from little craft boxes. It's to hang in a baby's room. I found this at Paper and Cookies.
Here's another super cute one....with FREE printable templates....this couldn't be simpler! Thanks to At Second Street.
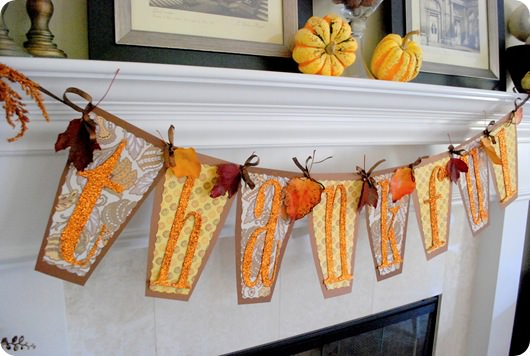
Thanksgiving one from: TipJunkie
Shamrocks anyone? This is colorful and vintage looking using pages from an old book. Super simple and made super cute by Simple as That.
And a nice Halloween one. this ones made from felt and there's a nice printable template. Thanks Finding My Aloha!

Sunday, July 1, 2012

Paper Trees

It's Christmas in July at Magical Holiday Home and I'll be making TREES all month long and perhaps a few ornaments also because our theme this year is...."Oh Christmas Tree!"
This week my feature is paper trees. I found this idea on a couple different blogs so I thought I'd try my hand at it too!
First I went in search of some oldish looking paper because I wanted to make some vintage looking ones. Behold an old church hymnal....perfect. The trees were easy to cut out but fanning out the branches wasn't as easy as it looked! I still need to fluff these a bit. They actually look better in person than they do in the pic.
I am thinking about making several more of the smallest one to go with my vintage Christmas houses.

Sunday, June 17, 2012

Tinting Bottles

So I am redoing my office at school in a beach cottage theme therefore I decided to try my hand at tinting some bottles.
The two rippled ones are ones I bought at the Dollar Tree store because I liked the ripples. The other three are tinted and painted.
I read that to tint bottle you could use a little watered down modge podge and food coloring. There were two methods I discovered.
One was to pour the mixture into the bottle and swish it around to cover the inside completely. Next turn the bottle upside down for five mintues and then right side up for five minutes and last of all to bake it on the lowest temperature in the oven for like 20 minutes. This would hasten the drying process.
The second method was to use a sponge, paint brush or rag to paint the outside of the bottle with the modge podge solution.
I first tried the painting one. I liked the look with a rag not a brush because the brush left too many brush strokes. I liked the frosted look. As it dried though it didn't seem quite dark enough so I decided to also pout the mixture inside and coat it. I did not put the bottle in the oven but let it dry. This left a slight ring around the bottom of the bottle but doe not take away from the over all effect.
I tried doing the pouring inside the bottle without painting the outside but I didn't get the same frosted look. So for me a combination of the two methods gave me the look I desired.
The white and blue bottle is spray painted (I read it would make it look like milk glass but mine didn't). I used a sponge to add some blue paint. I'm not crazy about it but will try painting again on another bottle

Sunday, May 13, 2012

More Wooden Letters

Here's another set of wooden letters I decided to finally do something with! These JOY letters were bought on clearance at Walmart. They are actually white letters meant for a child's room, so you can spell out their name. I wanted to decoupage them and meant to use either different kinds of wrapping papers or scrapbook paper. Then when cleaning out a shelf in the craft area, I found this vintage looking scrapbook paper and decided to use it! I really do like how they turned out. They will look cute hanging above the vintage Christmas village!
Do you have a craft lingering in your "to do" pile. If so NOW is a great time to create it!

Sunday, April 29, 2012

Crafty Kits: BOO

I set up some Crafty Kits back in February....a combination of all those random crafts I bought supplies for and started but never finished AND crafts that I want to create for Halloween and Christmas. I finally worked on one of the little projects...My BOO blocks. I bought these blocks (I'm ashamed to say) a couple years ago at the flea market with the intent of painting and collaging them. Here's what I ended up with...

Sunday, April 22, 2012

Summer Art Journals

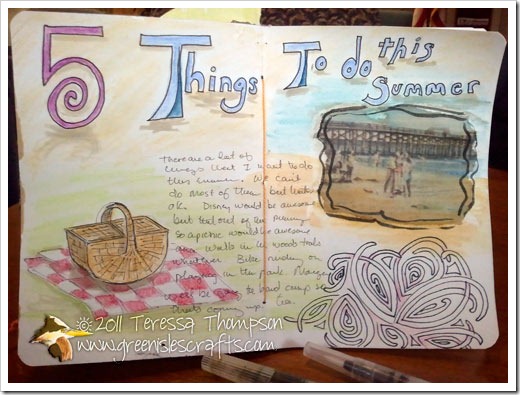
I love the way this art journal is beautiful and a "to do" list all at the same time. Check out her description of it at Drawing Near.
Full-Pageforweb
Here's another splendid idea over at Greenislecrafts.
An art journal calendar page....simply delightful! At Dreamciclejourneys

Sunday, April 15, 2012

Sunday, April 8, 2012

My Princess Card


I am the one who loves pretty things.
I am the dreamer of dreams that end happily ever after.
I am the one who dreams of leaving the mundane for the magical.
I am the one who believes in the power of love.
 
I give you the desire to explore new things, the softness of beauty, and the caress of enchantment.
I give you the wonder of dreams and the goodness of life.
I give you the doorway.
 
I want you to soar, to recognize your beauty, to pamper yourself and to indulge in the riches of life.
 
You are a princess. Your riches are inside you.
Your soul, your spirit is more valuable than diamonds or rubies.
The measure of your worth is not in dollars and cents but in the essence of you!
Hold this knowledge and do not let the weary world rob your of your treasure.

Sunday, April 1, 2012

Animal Companion Cards

The SoulCollage cards are divided into different "suits" and one is called the Companions Suit. Companions can be thought of as the energy dimension of our lives. Some beleive that these cards are linked to the different chakras. Others view this suit as our animal companions or totem animals. Some believe they are a combination, animal guides who also represent one of the energy points of the body.
After much reflect and the creation of two Companion cards I tend to lean toward a combination. The first animal that I considered to be "mine" was the dragonfly. I'm not exactly sure what drew me to it. Perhaps my interest in faery folklore, which includes the idea that some dragonflies are faeries in disguise. Whatever the reason, dragonflies just kept popping up all over the place. One morning around my flowerbed in the backyard hovered a dozen or more dragonflies. It was at that moment that I thought....dragonfly-totem animal. I love Native American believes and had been reflecting on totem animals and the role they play in Native American beliefs. I have know the dragonfly was "mine" for a couple years now. It took much longer for the Fox to come into my life. Patience is important when working with the Companion Suit. You can't push the process of discovering your animals but must let the process unfold.
These cards may look as if they are single pictures but they are not. The backgrounds are a single picture with the animal cut out from another picture and integrated into them.
In my next post I will write about the meanings of the dragonfly and the fox. I will also link them to two chakras and how they seem to fit into my life. Remember that these are personal thoughts and should the animals come into your lives...they may have a bit of a different meaning to them!

Sunday, March 25, 2012

SoulCollage Cards

If you watched the video I posted about SoulCollage then you have just a tiny idea of the process involved in creating these cards. They are artistic creations but not mere creations. To me they are more like the soul speaking. I've made a Princess Card and a Warrior Card which I will share a bit later. I have also completed the "I am the One Who..." exercise with them. It's an enlightening exercise to look at the card you have created and let the words flow from you. These two cards are the first two I created. I also created some of my totem animal cards, animals for the chakras. My dragonfly and fox cards are simple yet powerful. I still need to do the I am the One Who exercises with them.
For today though I wanted to share two newer cards, ones that I have created within the last two weeks.
The Royalty Card: Doesn't she look regal and so in control sitting there. I used this image against a gold background card and added the archway to it.
When I first picked the image I really didn't think about what it would represent or even why it appealed to me. Such is the nature of SoulCollage. She's pretty don't you think? After creating this card I reflected on it a bit...and even though I haven't completed the exercise yet...some things jump out at me and I am starting to get to know this card, this part of me a bit.
This is the one who is rigid with following the rules, that is a bit stern and who frowns on fun and frolic. She has a position to maintain afterall and she can't just let loose. She longs to though, sitting there with folded hands and a slight smile. Behind that face that gives nothing away is one who longs to be free and dance in the moonlight!
The Wild One
Isn't it interesting that I created this card around the same time as the Royalty card? Again thinking of nothing in particular...simply seeing some images and putting them together to create this card. I call it The Wild One.
The Wild One wanders the earth, seeking adventure, dancing in the full moonlight, walking barefoot in the dirt, and eating berries with juice running down her face! She is primitive, perhaps, but in tune with her own needs and wants and desires.
So there you have it: two SoulCollage cards created through free thought and the selection of random images, coming together to let the soul speak. They were created and only days later did the ideas about them unfold in my mind...The Royalty and The Wild One....I love them both!

Sunday, March 18, 2012

SoulCollage Cards Project

Welcome to our new Sunday series...SoulCollage Cards. SoulCollage is a technique and process created by Seena Frost. You can read more about the process at SoulCollage.com It has been around for years but I still see great value in the process and want to highlight it here at The Creative Spirit. I actually started work on my first SoulCollage card about two years ago. I ordered some materials and collected some pictures. I made one card and started on a second one. But then as so often happens in life, the project got sit aside. Too much to do and only so many hours in a day. The whole idea and the whole process however remained in my head and heart. About three months ago I started working on the project again. I made three additional cards. Again the project has stalled. I have several more cards in mind but none of the images I have right now are "speaking" to me. After bloggin the 17 Days of Green art journal I decided that bloggin a project makes one more motivated and committed to work on the project. Thus I decided to do a Sunday SoulCollage series. Right now I have it slated as a 8 week series but who knows...perhaps it will really "take off" and I will continue it for even longer.


Saturday, March 17, 2012

17 Days of Green: Day 17

Final page... :) I made it through all 17. That in itself is an accomplishment. For Day 17 a simple pot of gold at the end of the rainbow...covered with glitter paint and a Happy St Patrick's Day!

Friday, March 16, 2012

17 Days of Green: Day 16

Dance little leprechaun! We are on Day 16....I can't believe I am actually going to finish this little project!!

Thursday, March 15, 2012

17 Days of Green: Day 15

I decided to include a page with a short list of things I've learned from doing this art journal. I didn't journal as much in it as perhaps I should have so including this page added some "personal thoughts."

Wednesday, March 14, 2012

17 Days of Green: Day 14

Since leprechauns are famous for their shoemaking...when I say this wording in a magazine I decided to create a page using it!

Tuesday, March 13, 2012

17 Days of Green: Day 13

I found this little skeleton and I thought it would be fun to create a forensic page for a leprechaun! Ok, as I've said before this little art journal is making me STRETCH my imagination!

Monday, March 12, 2012

17 Days of Green: Day 12

Page of words....to describe leprechauns. I used some metallic marker to edge the page, torn paper and words clipped from magazines.

Sunday, March 11, 2012

17 Days of Green: Day 11

For Day 11 I decided to try creating a leprechaun's house....there the little fellow is...dancing on the roof! I added some moss for a three dimensional look too!

Saturday, March 10, 2012

17 Days of Green: Day 10

I used those little colored bears....only because the colors made me think of a rainbow...they are sort of interesting though. This page is a combination of modern (bears) and the ancient (sand design and old page from a journal). It remind me that Ireland is a mixture of a modern and ancient. I am of Irish ancestory and have always wanted to visit Ireland but alas have not had the pleasure of doing so!

Friday, March 9, 2012

17 Days of Green: Day 9

Day 9....I thought about all the folklore and "magic" associated with St. Patrick's Day and Ireland....so hence this page. As I mentioned in an early post this little project is stretching my imagination. I am looking for ways to have the "essence" of Ireland or St Patrick's Day present on each page and yet use a variety of materials and techniques.

Thursday, March 8, 2012

17 Days of Green: Day 8

I love this little cottage and I was thinking about how awesome it would be to live in a place like this....then I started thinking about working on those flower beds....lol.

Wednesday, March 7, 2012

17 Days of Green: Day 7

I decided to do a mandala page....I added the shamrocks because the page seemed sort of "empty". I used sharpies but they didn't work as well on the painted page as they do a regular page. I also used the metallic markers. They worked great!

Tuesday, March 6, 2012

17 Days of Green: Day 6

For this page I started out sort of collaging on bits and pieces. I didn't really like the way it looked so I picked up a bottle of green glitter paint at Walmart. It certainly did the trick.....I like it a lot better with the glitter paint.

Monday, March 5, 2012

17 Days of Green: Day 5

As I posted earlier, I didn't want to but a lot of material for this journal but when I was in the Dollar Tree I found some window clings. There are quite a few on the sheet. I wondered in they might work in the art journal because for a dollar....they were cheap enough. So here's one of the little lerprecahun guys and he worked just fine. He almost looks like a rub on. I modge podeged under and over him!

Sunday, March 4, 2012

17 Days of Green: Day 4

I wanted to get a little different look on this page and I happened upon the frog in a magazine...and with the saying...'its easy to be green." I thought it would work nice on this page! It's day four and I feel like I am getting a little be more flow to the journal process.

Saturday, March 3, 2012

17 Days of Green: Day 3

I wanted to make a page that was about GREEN but ended up making a page about Ireland (well sort of). I can tell that this project is going to STRETCH my mind with trying to keep the pages different.

Friday, March 2, 2012

17 Days of Green: Day 2

Here's the day two page. I am really liking the metallic pen in gold....it goes on very smooth and is nice and shiny. I used a Celtic design I printed off the internet and then a Irish saying. I then added some design around the design. It's pretty simple but I like it!